Now that I have created several board game conversions in Unity, I thought that it might be useful to create a tutorial that describes the process that I go through to make a game.
In this tutorial, I’ll start with a common set of code from prior games and some basic art. I’ll create a new Unity project, import all the reuse code and plugins that I use, and make a complete game.
There is a set of videos to go along with this post which show all the steps that I perform in the Unity game builder.
I’ve also saved my Unity project at a few points along the way so that you can skip ahead or make sure that your project matches mine.
In this post, I’m going to cover all the reuse code and the reasoning behind it. I’ll setup the project, import all the plugins, scripts and assets that I’ll need. Then I’ll build the main menu.
In the next post, I’ll build the UI for the game itself and create the scripts for modeling the game. In the third and final part, I’ll add game control events and animations.
Step 0 – Unity
Download Unity version 5.6 (I’m using 5.6.0f3). Install the 64 bit version with Visual Studio 2017 and the windows desktop/standalone module. You wont need any of the other modules for this tutorial.
Step 1 – Reuse
It is useful to have a basic understanding of the way that we build games and of the common code that I import into a new project. To cover that background information, I’ve created a series of pages describing each part of the common code:
- Touch – Describes multi-touch handling in Unity and passing touch events to the Unity UI
- Utilities – Covers all the utility classes and functions that we’ve created over time
- Game Model – The “Model” part of the Model/View/Controller pattern
- View – The skeleton classes for running the GUI
- Event System – The “Controller” part of the Model/View/Controller pattern
- Events – The events that are common to all our games.
Step 2 – Import plugins and reuse
To start a new project, start Unity and create a new 2D project. Then add the DoTween (for animation) and TextMesh Pro (for better text) plugins. These are free assets on the Unity asset store and can be added to the project from the Unity editor.
I also usually add the UniExtender plugin. This asset is useful, but isn’t free, so I’m going to skip it for this tutorial (see the Utilities page for more detail).
Then add Newtonsoft.JSON, Windows Voice and all the reuse code to the project. You can download a zip of the Newtonsoft.JSON dll and my Windows Voice plugin here. Finally you can download the reuse code here. Drag these files into the Assets directory.
Step 3 – Art and Audio assets
The next thing that I do for any project is to collect the art assets that I am going to need for the project. I typically pull images from TheNounProject.com and other sources of free art assets. images.google.com has a filter for images that are tagged for reuse. I am also often able to re-use art and sound from other games.
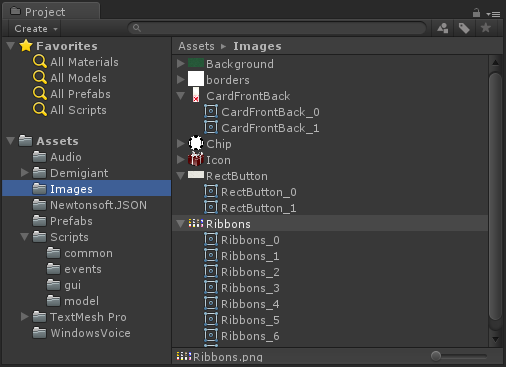
For this tutorial, I’m going to keep the art to a minimum. I’ll import a standard button and panel image for the UI elements. I’ll re-use our standard place ribbons, a felt background, a playing card and a poker chip image from another card game I made. I found a wrapped present image from wikimedia that I’ll use for the icon.
For sound, I’ll grab a button click, shuffle, card flip and coin click sound from another game. I pulled an intro clip from a free Unity asset. My normal source for audio are a couple of Unity audio assets that we have bought along with sites like freesound.org and pond5.com. Often a google search for the specific sound and the term “free sound effect” works best.
For a normal project, collecting the images and audio that I want and tweaking/coloring/compositing them in Photoshop takes 8-10 hours.
Here is a zip of the Image and Audio directories that I’m going to start with. These should be placed under the Assets folder. ArtAssets
In the Unity editor, I need to setup the button, panel, card and ribbon images. They are sprite sheets and have multiple images in one file. Click on the Image in the Project panel and then change the “Sprite Mode” to “Multiple”. Hit “Apply” and bring up the Sprite Editor window. Select “Slice” then “Grid by Cell Count”. Enter the number of rows and columns and hit apply.
The Panel and Button images should also be setup as a 9-box. A 9-box or “sliced” image is a convenient way to use one image for many differently sized images.
When an Image is set to “sliced”, Unity will draw the four corners of the source sprite in the four corners of the new image. Then it will stretch the top and bottom horizontally to the size of the new image. The left and right are stretched vertically and the center is stretched both vertically and horizontally to fill the middle.
No special processing is needed for the audio.
After this step, your project window should now look like this:
Step 4 – Project settings
Edit the “Player” settings which is under the “Edit” menu. Set the Company and product names. Select the wrapped preset as the Icon. Under “Resolution and Presentation” set the “Display Resolution Dialog” to “Hidden by Default”. Turn off the splash screen.
We use subversion for version control and backups. Git works too. If you are going to use any version control software, you’ll want to limit the size of the diffs by storing everything in text. In the “Editor” settings, change the “Version Control” to “Visible Meta Files” and the “Asset Serialization” to “Force Text”. To do your first “add” to version control, save the Scene, exit Unity, and add the “Assets” and “Project Settings” directories to your version control.
If you’d like to make sure that you have the same setup as I do, or would like to skip these first four steps, you can download a setup project: No-Thanks-Setup
Step 5 – Setup the Cameras and Canvases
Cameras
Change the default “Main Camera” to have a Size of 10 and a clipping plane of 1 to 100. Add an “Aspect Utility” behavior. The “Aspect Utility” will add black bars to the left and right or top and bottom if the actual screen resolution doesn’t match the desired 16:9 aspect ratio. (For more info, see Board Game Programming Tutorial – Utilities)
Duplicate this camera (CTRL-D) and call the new camera “animationCamera”. Change its “Clear Flags” to “Don’t Clear”. Remove the “Audio Listener” behavior since we only need one of those in the scene. Set the “Depth” to 1. This will cause the “animationCamera” to render on top of the “MainCamera”. Setting the “Clear Flags” to “don’t clear” keeps this camera from deleting anything rendered by the “MainCamera”
The animation Camera will render the animation canvas. Having separate cameras for the main canvas and the animation canvas allows the trail renderer which I use to highlight moving sprites to be drawn above the main GUI. In general, it can be tricky to use both 2D UI elements and 3D elements with the same camera. I’ve had a hard time getting the z-ordering correct if I try to use the same camera and canvases with different layer orders. It works best to have one camera for 2D and another for 3D if possible.
Canvases
Create a Canvas called MainMenuCanvas at the top level. Set it as screen space – camera, pixel perfect, distance of 10, scale with screen size, 1920×1080, screen match to expand. When you are done it should look like this:

Setting the “Render Mode” to “Screen Space – Camera” places the UI in the 3D world instead of on top of it. This allows 3D elements to be above the board. We always design for 1920×1080 because our target hardware is televisions and that is the standard HD resolution. 4K TVs are exactly twice that resolution, so if we use image assests that are twice as large as needed for 1920×1080, everything will look correct and twice as sharp on a 4K TV.
The first time that we create a canvas, Unity makes an EventSystem object. This object handles mouse and touch input and passes mouse and touch events to the UI elements. I don’t change anything in this object.
Duplicate this Canvas and name it “LoadCanvas”. Change the “Order in Layer” to 1. This will cause it to be rendered after the MainMenuCanvas, so it will always appear on top of the Main Menu. These canvases are only used for the main menu and are set inactive once a game is started or loaded.
Duplicate the MainMenuCanvas and name it GameCanvas. Duplicate the GameCanvas twice and name them DialogCanvas and AnimationCanvas. On the AnimationCanvas, change the “Render Camera” to “animationCamaera”. On the DialogCanvas, set the “Order in Layer” to 1. Now we have three canvases that will be used during the game. The main GameCanvas is rendered by the main camera and will display all the static pieces and the board. Above the board, the main camera will render the dialog canvas. Then, the AnimationCamera will render the AnimationCanvas. This will keep all dialogs above the board and all animations (which includes a 3D element) above everything.
Audio
The main camera had an audio listener behavior. This is half of the audio system. To play sounds, we need to add an Audio Source. To do that, create an empty game object at the top level and name it “Controller”. Add the re-use script called “Audio Player” to that object. Adding the audio player behavior will automatically add the dependent Audio Source behavior. (Read more about the AudioPlayer in Board Game Programming Tutorial- Utilities)
For now, set the number of clips to 2 and add the Intro to the first and the Click to the second. If you look at the AudioPlayer script, those are the labels that I have given to the first two elements of the clip enumeration. These clips are expected to exist. The Intro clip will be played when the game starts, and the Click sound is used for buttons on the main menu.
Step 6 – Main Menu
Background
The goal of the main menu in a game is to allow players to join the game and pick a color. I also allows players to choose game options or load a previous game.
For a touch table, the players are sitting around the screen which is laying horizontally. So some of the players are going to be looking at the screen “upside-down” from the developer’s perspective. This means that player controls need to be correctly oriented for where the player is sitting. It also means that the “preferred” orientation for common game elements may not be up and down on a monitor.
More about accommodating a flat screenIn some games, we have automatically rotated the board to be up for the current player. Lately, I’ve been orienting games so that most players are sitting at the top or bottom of the screen and the top of the game board is on the right side.
Another thing to keep in mind is that the standard “fake 3D” effects like drop shadow, bevel and emboss will not look right for players looking at the object upside down.
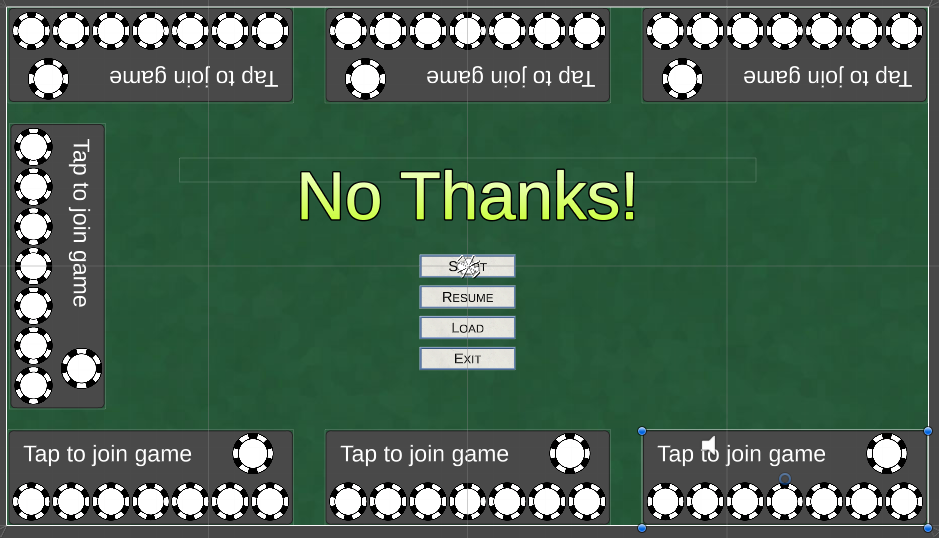
“No Thanks!” plays seven, so I’m going to arrange three player positions on the bottom and top of the screen and one position on the left. In the main game, I’ll have the current card and pile of chips in the center-right pointing toward the left side of the screen. I’ll put the “undo” and “exit” buttons on the right facing the left.
I always use a set of four buttons: Start, Resume, Load and Exit. Start begins the game and is grayed out until there are enough players. Resume loads the last saved game. Load brings up the load dialog which lists all the saved games.
If a game has options, I’ll put an option panel right on the main menu.
Player Colors
I will typically allow players to pick from a set of colors that work best with colors I’ve chosen for the game board and common pieces. I usually end up with players being able to choose between the primary and secondary colors (red, green, blue, yellow, purple, cyan). The if a game has more players I’ll add orange or brown.
Since I typically use the same colors for players, I’ve defined color names in PlayerList.cs and the color definitions in GameGUI.cs. The color names are used by the voice system to reference a player by their color. The MainMenu.cs script will use these color definitions to automatically color the color selection buttons.
I allow players to select their color from all the colors even if another player has chosen that color. The code gives the color to the selecting player and gives the old player a new color.
Controller
First lets setup the controller object. This object contains all the “singleton” type game control scripts. This includes the Windows Voice, Timeline, Game, PlayerList, MainMenu and GameGUI.
We can populate the members of the GameGUI now, and we’ll populate the MainMenu members after we have finished laying out the UI.
For the GameGUI, we can drag in the canvases that we created in the last step and drag in the ribbon images. The Load Overlay member is an Object to show while the GameUI is being drawn. For now, create an Image under the dialogCanvas that is black and fills the screen. Set it inactive and add it to the GameGUI. We’ll do the PlayerPads and Game Pieces when we start on the main game UI.

UI Elements
Next lets create the UI elements that make up the main menu.
- Background is an image that fills the whole canvas and has the felt background image.
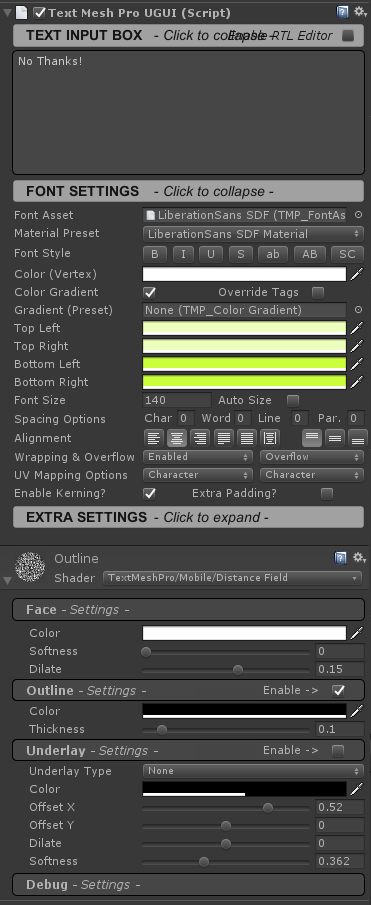
- Title is a large TextMesh UI element with the name of the game. Normally I’d have an image for the title, but here I made a light gradient and an outline on text for a simple title.
- I also gave the title text an outline. To do that, first create a new material and name it outline. If you don’t make a new material, all TextMesh objects will be outlined. Then turn on the outline and set a thickness. Then set the “Dialate” under “Face” to 0.15 to make the text thicker.
- I also gave the title text an outline. To do that, first create a new material and name it outline. If you don’t make a new material, all TextMesh objects will be outlined. Then turn on the outline and set a thickness. Then set the “Dialate” under “Face” to 0.15 to make the text thicker.
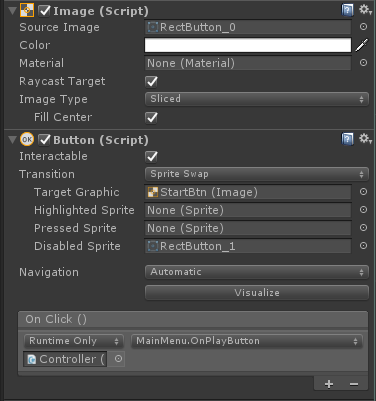
- 4 buttons. All the buttons use the RectButton image in “sliced” mode with a transition of “sprite swap” to the grey RectButton image for the inactive state. All the buttons have an OnClick callback to the MainMenu object. The MainMenu re-use class already has the callback functions defined. The buttons have a TextMesh child element with the name of the button.
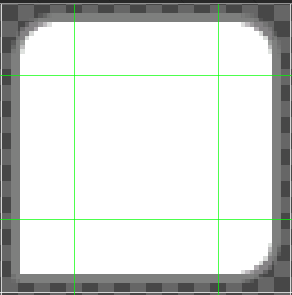
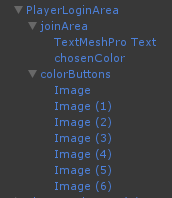
- Player areas. The player area is going to be a Prefab so that changes made to one can be quickly replicated to the other player positions. Make the first player area by creating an Image element with the rounded “borders_0” image and a size of 600×200
- Add the PlayerLoginArea behavior to the top level player area.
- Add a child element called “joinArea”. This can be an empty element. Set it to take up the top half of the login area. Add a button behavior and set the transition to “None”. Add an OnClick callback and have it call PlayerLoginArea.OnJoinClicked
- Give it a child TextMesh element on the left with the text “Tap here to join”.
- And a child Image element on the right called “chosenColor” with the chip image.
- Add another child element called “colorButtons” to the player area. This can also be an empty element and should take up the bottom half of the area. Give it a horizontal layout so that the child chip images are laid out for us.
- Set the left and right padding to 8 and turn on control child size width.
- Add seven child Button elements with the chip image and turn on “Preserve Aspect”. They should each an OnClick of PlayerLoginArea.OnColorClicked. This function takes a parameter and it should be an index from 0 through 7.
- Setup the PlayerLoginArea behavior by dragging in the “Controller” object as MainMenu, the “chosenColor” in the “joinArea” for Chosen Color, and the TextMesh in the “joinArea” for the “Join Text”. Set the position to 0.
- Now make the player area that you’ve created a prefab by creating a Prefab directory under the Assets directory and dragging the player area into the Prefab directory.
- Position the player area in the bottom right corner. Duplicate it twice and put #1 in the bottom center and #2 in the bottom right. Duplicate it again, set the rotation to Z=-90 and put it on the left. Duplicate the first three area, set their rotation to Z=180 and flip the sign of their PosY. This should arrange them on the top of the screen.
- Set the Position value in the PlayerLoginArea behavior on all the areas. The first should be 0 and the rest should go up by one each (matching the autogenerated number in their name).

MainMenu behavior
Finally, lets populate the members of the MainMenu behavior by dragging in the UI elements that we have created. Drag in the LoadCanvas, MainMenuCanvas, StartButton, and ResumeButton. For now we will skip the credits dialog and saved game entry prefab. Add the player areas by clicking the lock button on the inspector, then selecting all seven player areas in the hierarchy and dragging them onto the “PlayerLoginAreas” member.
Before the game will run, de-activate the GameCanvas and LoadCanvas. At this point we can press play and test out our main menu. When the game starts up, the MainMenu.Start() function is called. This code activates the “Resume” button if there is a saved game and plays the Intro music. It also has the player areas draw themselves. The player areas fill in the available colors from the defined colors in GameGUI.
When a player clicks on the join area or on a colored join button, the main menu assigns colors based on the request and draws the affected player areas. It then sets the Start button active/inactive based on how many players have joined and the minimum number of players defined in PlayerList.cs. For this to work, bring up Visual Studio by double clicking on Assets/Scripts/model/PlayerList.cs and set MIN_PLAYER to 3 and MAX_PLAYERS to 7.
When the Start button is clicked, the MainMenu stops the intro music, de-activates the MainMenuCanvas, tells the GameGUI to start the game, adds EAddPlayer events to the timeline for each joined player, and an EInitialize event to the timeline, then finally saves the game. The EAddPlayer events hold the player’s position at the table and color. (Read more about the event system in Board Game Programming Tutorial – Event System)
The GameGUI sets the GameCanvas to visible. When the GameCanvas becomes visible, Start() functions for all the UI elements on that canvas are called. When the timeline processes the EInitialize event, the game model is setup and the game UI is drawn.
If you’d like to make sure that your project matches mine, you can download my project after completing the main menu. NoThanks – MainMenu
2 thoughts on “Board game programming tutorial”